DIY STRETCHABLE CHIFFON SKIRT
(Short Skirt/Pixie Skirt)
LEVEL OF DIFFICULTY: ★★☆☆☆
(This is the actual photo of the skirt I made, I really don't like the pattern. Anyway, I will post a look with the skirt on soon! :P)
To start the tutorial, the following NEEDED materials are listed below:
- sewing machine
- cotton thread (color similar to fabric)
- pins
- scissors
- 1 meter fabric (chiffon preferably not sheer or a thicker type)
- elastic waistband
- iron (optional)
STEP 1: Cut desired length. Must be long in width with but short in length.
(It kinda looks like a rectangle.)
This is how it looks like.
STEP 2: Fold the top edge of the fabric about 2cm. Place pins to serve as a guide.
(Fold from the outer part of the skirt going to the inner part of the skirt.
You can also press the folded part with iron.)
STEP 3: Start sewing the folded part about 1cm.
(This will create a cleaner look.)
STEP 4: Remove the pins as you go along.
STEP 5: Cut the excess off.
STEP 6: Fold the fabric in half.
Like this.
STEP 7: Sew the sides.
(After that, your skirt should be closed. As if you're wearing a "patadyong".)
STEP 8: Fold the top edge of the fabric again for about the length of your elastic band.
Mine is 2inches in length.
(Measure it first before placing pins. You can also press the folded part with iron.)
STEP 9: Sew the top edge again.
(This is where your elastic bandage is inserted.)
*Did you see the part I sewn earlier? It created a cleaner look, right?
STEP 10: Make sure to leave this part open for approximately 2-4 inches wide.
(This is where you'll insert the elastic bandage.)
Leave it open for a while, ok? :) Don't forget this!
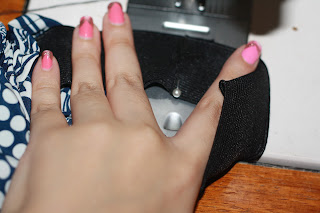
STEP 11: Measure elastic bandage on your waist first then cut it.
Put a safety pin at the tip. This will guide you while inserting the elastic bandage.
STEP 12: Insert the elastic bandage on the hole you left open. :)
STEP 13: Pull the elastic bandage and tug your skirt too.
Tug the skirt until both ends of the elastic bandage meet.
STEP 14: Sew the elastic bandage together. Sew it twice or thrice for a stronger hold.
STEP 15: Now, it's time to sew that part.
Close it. :)
You're almost done!
STEP 16: Sew the hem or the bottom part of your skirt for about 1-2cm.
Trim the excess for a cleaner look.
Sew the bottom part of the skirt.
TADAAH!
YOU'RE DONE!
Hmmm, I also made another one and it looks like shorts. lol
The blue one has a thicker fabric, which I prefer that
it doesn't really need an inner lining compared to the pink one.
If you have questions, feel free to ask me.
I will post a look wearing these skirts soon.
Cheerios!
XOXO
XANTHINA


